I've been building a small sample iOS app and in learning how to implement UISwipeGestureRecognizer, found two different approaches. None of the resources I found online were overly explicit in both approaches, so documenting here...mostly for my own future reference.
Option 1: Storyboard
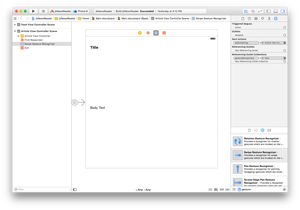
Xcode makes it easy to add a gesture recognizer to your app interface. Simply drag the appropriate gesture recognizer from the palette onto Storyboard, being sure to select the UI element that you would like to listen for the gesture. In my case, the entire view of my ViewController:
Next, select the gesture recognizer and Ctrl+Drag to your ViewController class. Select the settings as shown below in the pop-up. You can now implement the response to your gesture.
The Storyboard inspector also allows you to select swipe direction, etc. with the gesture recognizer selected.
Option 2: Code
Adding a gesture recognizer (in this case, a swipe gesture recognizer) requires just a few lines of code in your ViewController, typically in your viewDidLoad method.
let swipeRight:UISwipeGestureRecognizer = UISwipeGestureRecognizer(target: self, action: "doSomething:")

swipeRight.direction = .Right

self.view.addGestureRecognizer(swipeRight)
The only item left is to implement the handler for gesture, which is mostly identical to Option 1:
func doSomething(gestureRecognizer:UIGestureRecognizer) {

  print("doSomething called")

}
My preference is Option 1. Although the implementation is spread across two files, keeping all view-related bits in the Storyboard feels cleaner, but either approach will work.

